Night photography transforms familiar scenes into mood and texture. Low light demands planning, patience, and a manual-first workflow because most cameras struggle in auto after dark.
This short guide defines the scope: handheld low light, city scenes, landscapes, the sky, moon views, and long exposures. It covers any camera with basic controls, including smartphones with manual or pro modes.
Expect slower shutter speeds, wider apertures, and higher ISO settings. Stability and focus precision become critical for cleaner results and fewer blurry shots.
Follow a clear learning path: basics, planning, gear, manual settings, focus, composition, stars, star trails, moon work, and editing. The article shares practical starting settings and shows how to adjust for scene brightness, motion, and focal length.
Outcome: sharper subjects, less noise, and more intentional storytelling in the dark through test shots and steady technique.
Night photography basics: what changes after dark
Night scenes demand different compromises because the camera collects far less light than during the day. Auto modes often fail; manual control and the exposure triangle (aperture, shutter, ISO) guide decisions that affect sharpness and tone.
Why low light forces different camera settings and technique
To gather enough light you lengthen the shutter, open the aperture, raise ISO, or add light. Each option changes image quality: wider apertures change depth of field, higher ISO creates noise, and long shutters can blur motion.
Common challenges
High ISO means more grain. Long shutter times create camera shake or motion blur if anything moves. Mixed artificial lights can skew color and light pollution reduces contrast, hiding faint stars.
Choosing long exposures vs faster shutter
Use long exposure for static scenes and creative trails from moving lights. Pick a faster shutter when people, cars, trees, or waves must remain crisp. Prioritize shutter speed for motion, aperture for light and depth, and ISO last to limit noise.
“Stability is technique: a tripod, bracing, and a soft-release habit matter more than an expensive lens.”
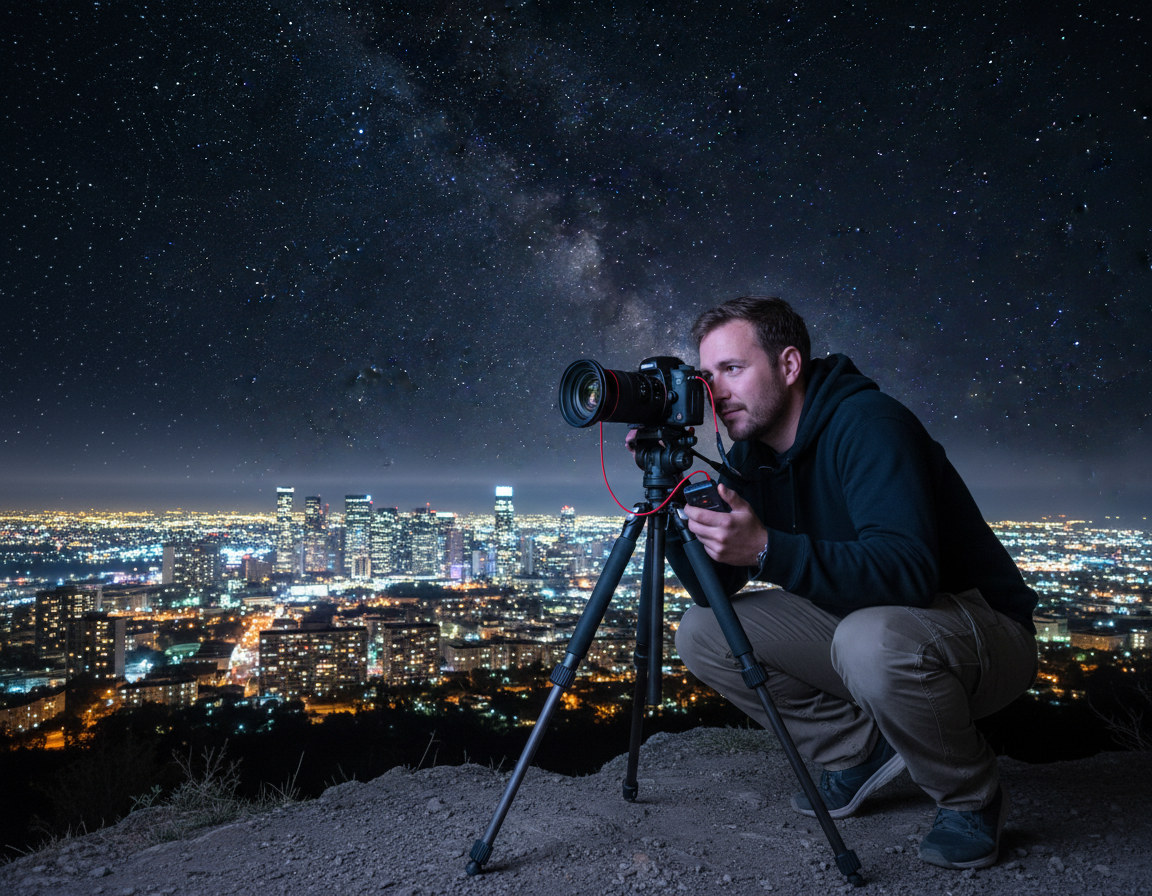
Quick examples: a city street needs shorter shutter and higher ISO than a moonlit landscape, while a star field wants wide aperture and multi-second exposures with strict stability.
Plan the shot for better results in the night
Smart scouting and timing are the difference between blank skies and usable results. Good planning reduces surprise problems and helps align foregrounds with sky features.
Check weather, cloud cover, and visibility
Confirm forecast elements you cannot control: cloud cover, humidity, haze, and wind. Wind affects tripod stability and sharpness; humidity can fog lenses and drain batteries.
Checklist:
- Forecast: cloud cover and visibility
- Wind and gusts for tripod safety
- Temperature for battery performance and focus shift
Use moon phases to control scene brightness
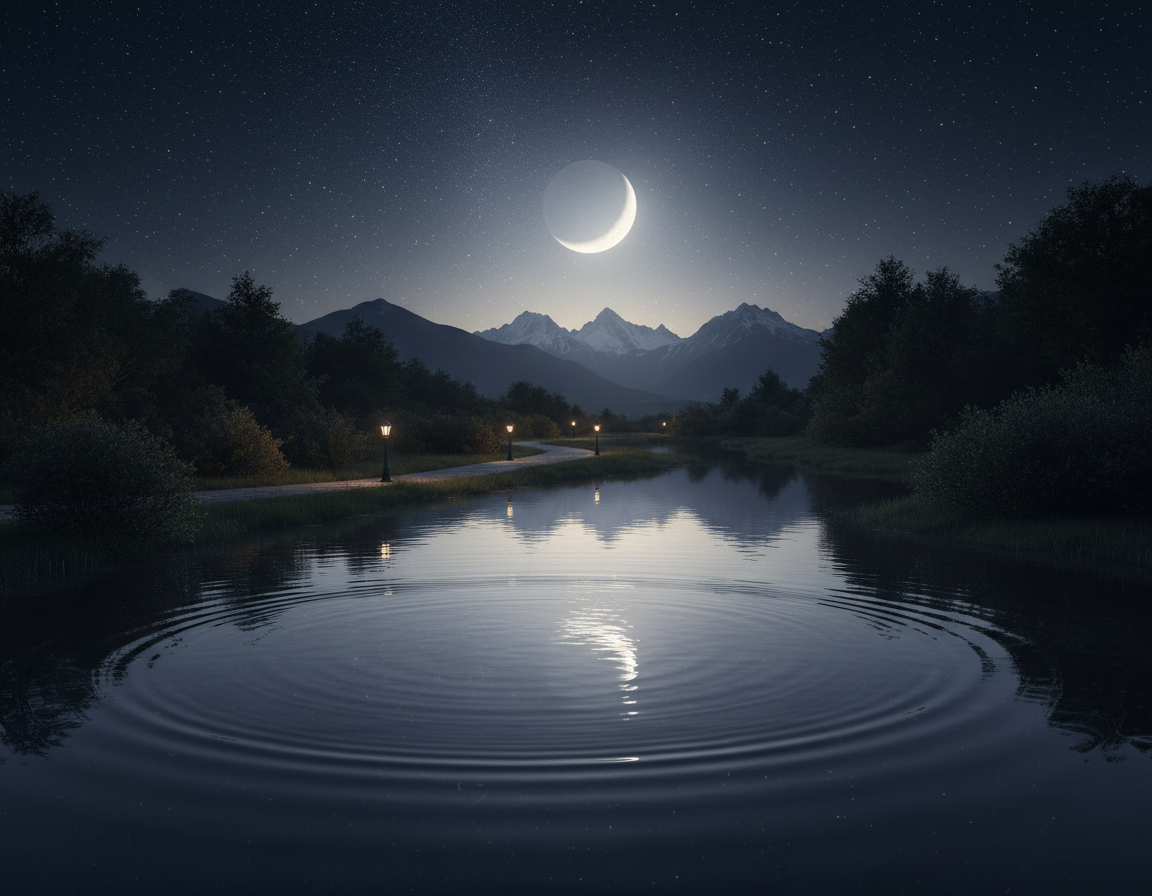
The moon changes everything. A new moon gives the best view of stars and the Milky Way, while a fuller moon lights a landscape but hides faint stars.
Crescent and half-moon phases often offer a mood balance between sky detail and foreground illumination.
Scout locations and reduce light pollution with maps and apps
Move even a few miles from city glow and contrast improves dramatically. Use light pollution maps—look for green, blue, or gray zones—to pick darker spots.
Know what’s in the sky: Milky Way, constellations, and timing tools
Use PhotoPills or The Photographer’s Ephemeris for rise/set times and azimuth. Stellarium and SkyView identify constellations and show the Milky Way window.
Daytime scouting and arriving before dusk cut setup errors. For quick practical guidance, see these concise night shooting tips that save time and improve results.
Essential gear for shooting night photos (and smart alternatives)
Good gear narrows the gap between a shaky attempt and a clean long exposure under stars. The right items protect image quality and cut setup time for any camera in low light.
Sturdy tripod and technique
A sturdy tripod is non-negotiable for multi-second exposures. Handholding blurs details, especially with longer lenses.
Extend the thicker leg sections first, lock clamps, and weigh the center column when wind is present. Avoid touching the setup during the exposure.
Lens choices for sky, landscape, and the moon
Pick a fast wide-angle lens for Milky Way frames and broad landscape scenes. Ultra-wide or fisheye gives more sky coverage. Use a telephoto lens (200mm+) for moon detail or compressed compositions.
Shutter triggering and timing
Use a remote release or intervalometer for sequences and stacking. The built-in 2s or 10s self-timer is a reliable alternative that reduces vibration.
Night essentials and smart alternatives
Bring a headlamp with red mode, extra batteries, and microfiber cloths. Lens heater bands or hand warmers prevent condensation. For beginners, a backpack can add tripod weight, a phone app may act as an intervalometer, and a kit lens works for practice.
- Quick checklist: camera, tripod, a fast lens, remote or timer, headlamp, spare batteries.
How to take photos at night using manual mode
Switch your camera into manual mode and control aperture, shutter, and ISO directly. This removes guessing and keeps exposures consistent for repeatable results.
The exposure triangle at night: aperture, shutter speed, and ISO
Aperture usually stays wide. Use f/2.8–f/4 for most sky shots to gather light and keep stars sharp.
Shutter speed balances motion and brightness. Short exposures freeze stars; long ones create star trails.
ISO is the final lever. Raise it only until the sky reads well, then check for unacceptable noise.
Recommended starting points and shutter rules
Try a baseline of f/2.8, 15–25s, ISO 1600 and refine from there. For f/4 glass, lengthen exposure or raise ISO a stop.
Use the 500 Rule as a quick guide for pinpoint stars, then shorten if your focal length or sensor demands it.
White balance and ISO strategy
Set white balance manually (Daylight or a fixed Kelvin). Auto can shift tones between frames and complicate editing.
Avoid pushing high ISO so far that stars lose color and become white blobs. Take a test image, check histogram, then tweak one variable at a time.
“Set, test, and adjust—one control per test—until the exposure and star sharpness look right.”
Get sharp focus in the dark without guessing
Getting crisp stars and foregrounds starts with precise focus, not extra exposure. Focus errors are the most common cause of unusable frames because wide apertures cut depth of field. Even a slight miss will make stars and edges look soft despite perfect exposure.
Use Live View and a bright point
Autofocus often fails in low light. Switch the camera to manual focus and use Live View. Find a bright star or distant lamp and magnify the preview.
Infinity is a reference, not a guarantee
The ∞ mark on a lens is only a starting point. Temperature shifts and humidity can move optical elements and change true infinity. Marks made in daytime may not hold at colder times.
Focus-check workflow
- Set the lens to MF and use Live View magnify.
- Adjust until the star is the smallest, cleanest point.
- Take short test shots, review at 100% on playback, and micro-adjust once.
- Lock focus and avoid bumping the focus ring; re-check after any change.
“Sharpening in post cannot fix poor focus; discipline here saves editing time.”
| Action | Why it matters | When to re-check |
|---|---|---|
| Live View magnify | Shows true pinpoint focus | After lens change or move |
| Short test shots | Confirm sharpness on sensor | After temperature drop or long times |
| Lock focus | Prevents accidental shifts | Before long exposures or multiple shots |
Remember: good focus technique is part of reliable night work. Re-check when you change focal length, move locations, or after big temperature swings. These simple checks preserve detail from lens to final frame and cut wasted time in post.
Composition at night: framing, balance, and storytelling
At night, deliberate framing turns scattered lights and shadows into a clear story. Strong composition makes the viewer find the subject quickly and feel the scene’s scale.

Rule of thirds still matters. Place the horizon on a third and put the moon or Milky Way on an intersecting point. Avoid centering everything; off-center anchors feel more natural.
Balance bright elements
Bright elements such as street lights or the moon dominate a frame. Counterbalance a bright anchor with a dark mass or a second light. Simplify when one strong light overpowers the rest.
Leading lines and trails
Use roads, rivers, fences, or light trails to lead the eye. Lines are a clear way to guide attention toward the main subject and add depth.
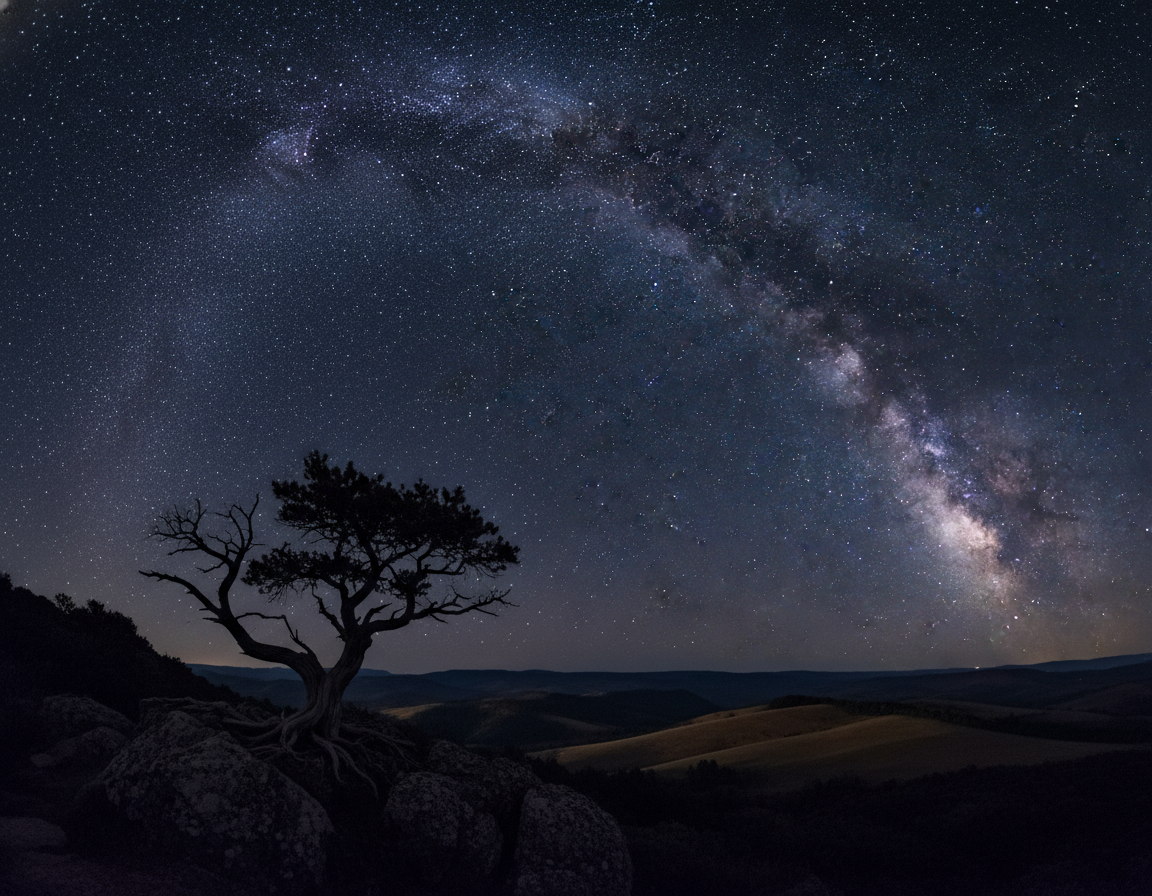
Foreground interest and scale
Silhouettes of trees, buildings, or people give scale and keep a landscape from feeling empty. A clear foreground anchor makes the sky read larger.
Compose with test shots
Quick test shots speed setup. Try a short exposure (5–6s) with high iso for a framing preview, then switch back for the final exposure.
| Tip | Purpose | Quick check |
|---|---|---|
| Rule of thirds | Balanced horizon and focal points | Move subject off-center |
| Leading lines | Guide viewer to subject | Adjust angle for stronger line |
| Foreground silhouette | Add scale and depth | Place silhouette near lower third |
Night sky photography settings for stars (pinpoint detail)
Pinpoint stars demand precise choices in aperture, shutter speed, and ISO for clean sky images.
Choosing aperture: shoot wide open for light gathering, often f/2.8–f/4. That yields bright stars and a usable image quickly.
If your lens is soft wide open, stop down one stop (for example f/4 from f/2.8) to gain edge sharpness and better landscape detail.
Shutter speed rules and the 500 Rule
The 500 Rule gives a quick shutter speed: 500 ÷ focal length = max seconds (adjust for crop sensors).
Example: a 24mm full-frame lens → 500 ÷ 24 ≈ 20s. This often works for web images.
Limitations: modern high-megapixel sensors and large prints reveal trailing. Use the 500 Rule as a starting point, not a guarantee.
NPF-style calculators for precision
NPF calculators add aperture and sensor detail for safer limits. Key inputs: focal length, aperture, pixel pitch (or sensor), and acceptable star blur.
They return a shorter, more accurate shutter speed than 500 Rule in many cases.
When a tracker matters
A star tracker lets you use much longer exposures and lower ISO. The result: cleaner skies, more color, and better foreground control.
Use a tracker if you want long detail shots or low-noise images for large prints.
Practical settings and testing loop
Common range: shutter 15–30s (within calculated limit), aperture f/2.8–f/4, ISO 800–3200 depending on camera.
Work loop:
- Shoot one frame.
- Zoom to 100% and check stars for trailing.
- If trailing appears, shorten shutter speed per NPF output.
- Then raise ISO to keep the histogram healthy without clipping highlights.
| Goal | Suggested range | Notes |
|---|---|---|
| Pinpoint stars | 15–30s, f/2.8–f/4, ISO 800–3200 | Keep shutter inside NPF limit; prefer lower ISO with tracker |
| Web-sized image | 500 Rule-based shutter, f/2.8, ISO 1600 | Acceptable for online sharing; may trail on high-res sensors |
| Large print or high-res | Tracker + longer exposures, f/4–f/5.6, ISO 100–800 | Cleaner files and richer color; requires precise polar alignment |
“Test, inspect, and refine—one change at a time keeps settings reliable and repeatable.”
Create star trails with long exposures and stacking
Long, looping arcs form when the sky is recorded over many continuous minutes or hours. These streaks, known as star trails, can be created with a single long exposure or by stacking many shorter frames for cleaner results.
Single exposure vs. stacking
A single long exposure is simple: open the shutter for minutes or hours and capture continuous trails. That method can produce pleasing results but raises noise, sensor heating, and battery concerns.
Stacking uses an intervalometer to record many shorter exposures (often 15–30s) and combines them in software. Stacking reduces noise and avoids overheating while preserving extended trails.
Suggested settings
Start with a wide aperture (f/2.8–f/4), moderate ISO (400–1600), and choose either one multi-minute shot or a sequence of 15–30s frames. Example single-shot baseline: ISO 100, 3600s, f/3.2 at 14mm for long arcs.
Stability checklist
- Use a sturdy tripod and tighten every clamp.
- Turn off lens and body stabilization when mounted on a tripod.
- Use a remote or intervalometer and avoid touching the camera.
- Shield the setup from wind and passing traffic to prevent camera shake.
Troubleshooting and efficiency
Gaps in trails come from long intervals or paused sequences. Condensation and battery drain usually show in long runs; plan for extra power and monitor gear over time.
| Issue | Cause | Fix |
|---|---|---|
| Gaps in trails | Interval too long or missed frames | Set minimal interval on intervalometer; test sequence |
| Excessive noise | Very long single exposure or high ISO | Use stacking or lower ISO and more frames |
| Vibration blur | Wind or touch during capture | Shield tripod, use weight, and remote trigger |
| Condensation | Temperature drop over time | Use hand warmers, lens heaters, or periodic checks |
“Plan the total session time, bring spare power, and review test frames early—small checks save hours lost to a single mistake.”
Moon photography: capture detail without blowing highlights
Because the moon is bright and contrasty, treating it like a daytime subject gives better results than boosting shadows blindly. The main risk is overexposure; preserve crater detail by using conservative settings and careful timing.
Timing and basic exposure
Shoot near moonrise or moonset. That timing lowers contrast with the landscape and adds warm atmosphere and useful scale. Moonrise/moonset often yields better color and context than shooting high in the sky.
Looney 11 baseline
Start at f/11 and set shutter to 1/ISO (ISO 100 → 1/100s). Adjust for haze, thin clouds, or desired crater rendering. This rule protects highlights while showing surface texture.
Lens choices and composition tips
For close-up detail, use a telephoto lens (200mm+), firm tripod, and calm conditions for crisp images. For moon-in-scene shots, include foreground elements for scale and balance the bright disk with darker masses in your composition.
Dual-exposure workflow
Shoot one exposure for the moon (protect highlights) and a second for the foreground (lift shadows). Blend frames in post for a natural look that retains moon detail and foreground mood.
Focus and stability notes
- Use single-point AF on the moon or manual focus with Live View.
- Use a tripod and remote or timer to avoid shutter shock.
- Lock mirror up on DSLR if available and watch for atmospheric distortion with long telephoto shots.
“Expose the moon conservatively and blend exposures when necessary for balanced, natural results.”
Editing night photos for clean, realistic images
Editing after a shoot brings order to raw frames and recovers subtle night detail. Start with a calm, consistent workflow that protects dynamic range and the natural look of the scene.
Shoot RAW and basic exposure first
Shoot RAW for more recoverable shadow detail and safer white balance fixes. Set exposure and black/white points before any creative moves.
Noise reduction and sharpening
Apply noise reduction gently. Example Lightroom starting points: luminance NR ~33, color NR ~25. Reduce luminance without smearing tiny star points, then add selective sharpening for stars and foreground detail.
Contrast, clarity, and white balance
Avoid heavy clarity or dehaze. Overuse crushes blacks and blows stars. Set a neutral white balance baseline, then nudge temperature and tint to shape mood without creating odd color casts.
“Edit for realism: recover, clean, then breathe life into the image.”
Final check: zoom to 100% for star detail, then view the full frame. Ensure the image reads naturally across sizes.
| Action | Order | Suggested values |
|---|---|---|
| RAW exposure & curves | 1 | Adjust blacks/whites, gentle highlights recovery |
| Noise reduction | 2 | Luminance ~25–40, Color ~20–30 |
| Selective sharpening | 3 | Mask stars and key foreground elements |
| WB & grading | 4 | Neutral baseline, slight temp/tint shifts for mood |
Conclusion
Consistent practice and note-taking turn guesswork into a reliable workflow for night photography.
Repeat this loop: plan for weather and moon, stabilize with a tripod and remote, set manual aperture, shutter speed, and ISO, nail focus with Live View, take quick test shots, then edit with restraint.
Focus decisions drive results: pick shutter speed for motion, use aperture for light and sharpness, and raise ISO only as needed to protect stars and reduce noise. The guide covered low-light scenes, pinpoint stars versus star trails, and moon detail with Looney 11 timing.
Next steps: try a nearby low-light scene this week, book a dark-sky session near a new moon, then plan a moonrise shot with a telephoto. Record what worked and what caused blur.
With steady technique and patience, any camera can make sharp, storytelling night photos.